Monday, December 23, 2013

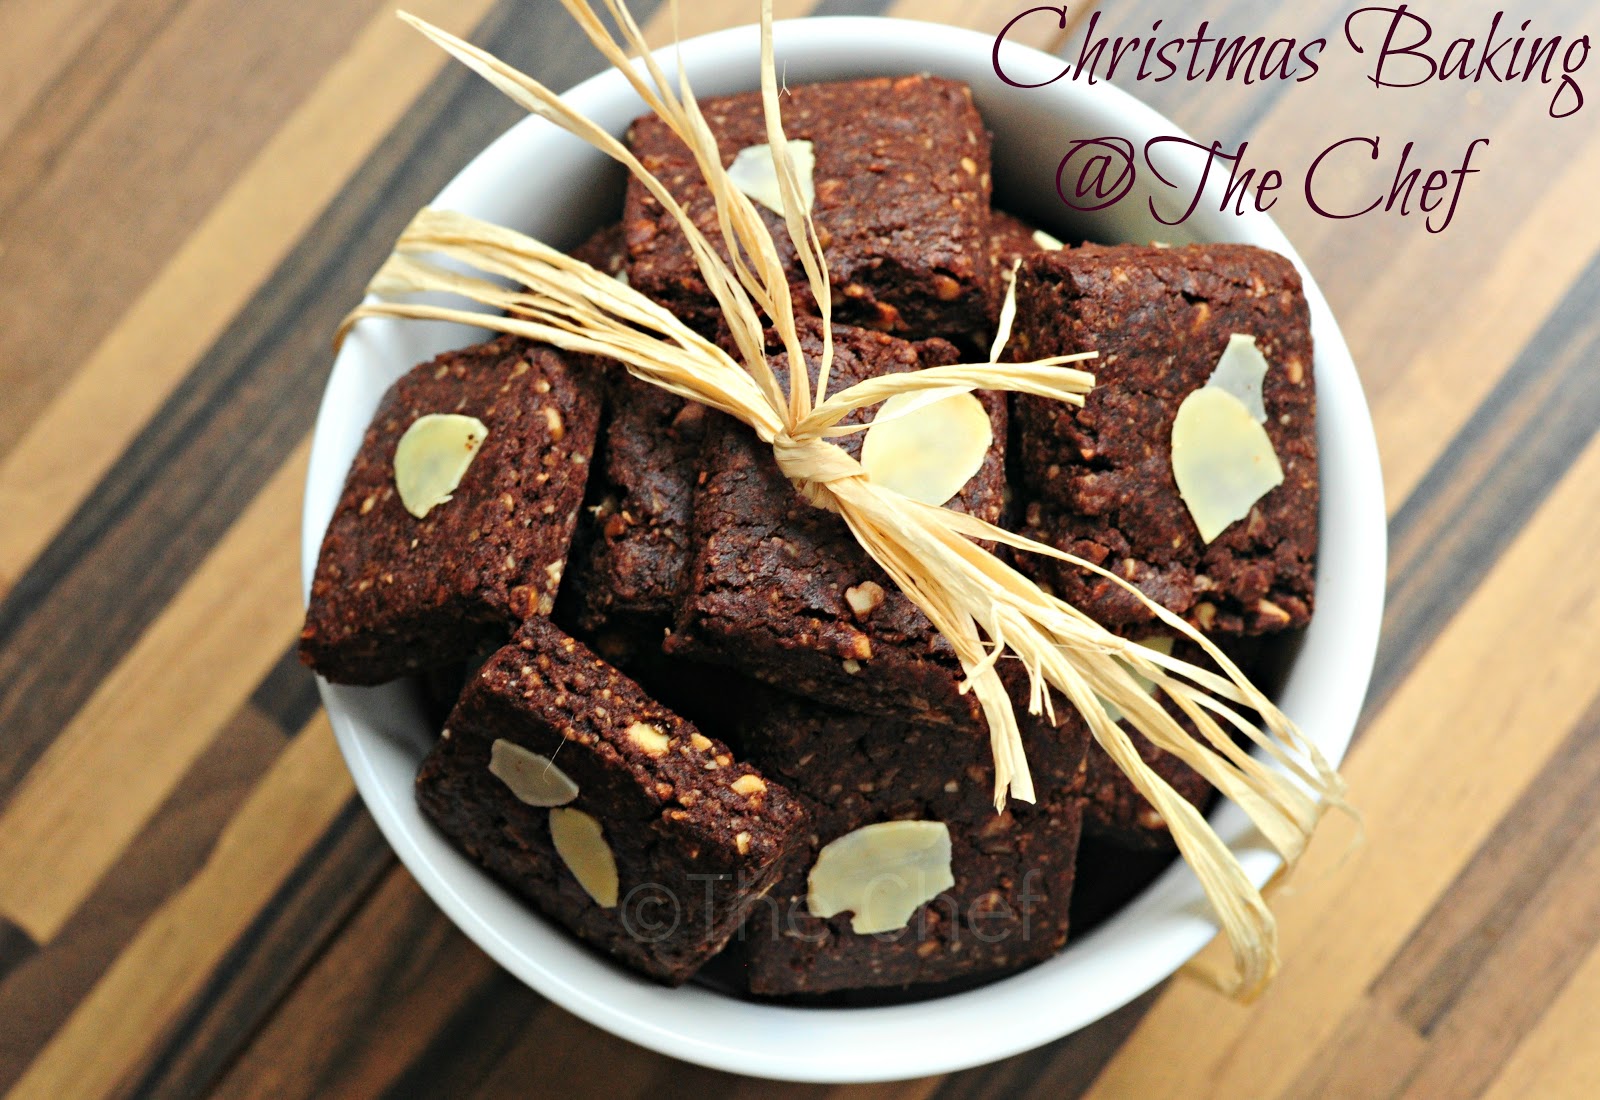
Chocolate Crinkles

This is our first christmas in Ahmedabad. Christmas in a new place is always hard for me. It means, beginning all over again with new customs, traditions, piecing everything together, both the old and new. When the season of advent began, I felt pretty low. I had the same feeling when we moved to Germany 4 years ago, so I knew that such feelings were normal. All the pictures of the christmas markets popping up on Facebook made me yearn for the european charm of the season. The only consolation was that I did not miss the harsh season of winter and once we opened our boxes of decoration, our home began to resemble a litte christmas market. 

First week into December began the questions as to when preparations would begin in the kitchen. I was not yet in the mood, not yet ready. Moreover, the kitchen was only fifty percent set up. Boxes were half opened and my utensils and gadgets were waiting patiently for a place to call their own. Last weekend, hubby and I pulled our sleeves together and gave both the kitchen and pantry a make over. And monday, the ball got rolling. 
Living abroad has certainly taught me to think out of the box and look for new recipes to brighten up our platter. When these crinkles popped up on my computer screen, I knew I would bake them. These are so very easy to bake and when they begin to slowly crinkle in the oven, there itself lies the satisfaction that you have done it right. They have turned out to be a complete winner in my entire set of goodies prepared this season. With another day to go before christmas, you can surely whip out a batch or two!


Source: Simply recipes
Ingredients:
  • 1 cup unsweetened cocoa powder
  • 1 1/2 cups white sugar(see notes)
  • 1/2 cup vegetable oil
  • 4 eggs
  • 2 teaspoons vanilla extract
  • 2 cups all purpose flour
  • 2 teaspoons baking powder
  • 1/2 teaspoon salt
  • 1 cup confectioners sugar

Method:
  1. In the bowl of an electric mixer with a paddle attachment (or a wooden spoon) beat together the cocoa powder, white sugar and vegetable oil until it comes together into a shiny, gritty black dough.
  2. Add the eggs one at a time, mixing for 30 seconds each. Add the vanilla and beat thoroughly.
  3. In a separate bowl, sieve together the flour, baking powder and salt. Mix well.  Slowly mix into the chocolate mixture on low speed until just combined. Do not overbeat
  4. Cover the dough with plastic wrap and chill the dough for 4 hours or overnight.
  5. Preheat the oven to 160C(See notes). Line a baking sheet with parchment paper. Place the confectioners sugar in a wide bowl. Take clumps of the chilled dough and roll them into 1 inch sized balls using your hands. Roll the balls in confectioners sugar and place on the baking sheet. 
  6. Bake for 10-12 minutes. Allow to cool a minute or two before transferring to a wire rack to cool completely.

Notes:
  1. Adjust the amount of sugar according to your liking. We needed it to be a tad sweeter and hence I used 2 cups of sugar. Also, since the sugar available here is pretty thick in size, I gave a whizz in the mixer to make the grains a bit fine(but not powder).
  2. No two ovens are the same. Since I am back to my oven of the past which was in storage for 4 years, it has taken me time to get accustomed to it. The above temperature and time is best suited for mine. The crinkles turned out crisp on the outside and chewy like a brownie on the inside.


Monday, March 4, 2013

Apple crumble

So I thought I would begin my post in March with phrases like "spring is in the air" or "we can feel spring approaching" BUT it's a different story altogether. SPRING is already here and I find it hard to believe. Last Monday we woke up to thick blankets of snow and today we wake up to new life sprouting from the ground. After six long months we were greeted with a gorgeous sunrise and blue skies. I went out for a long walk and spotted the first spring flowers in private gardens. I could have done a little jig at the first sight of colour!!
Coming back to this recipe, we had first tasted it in the plum form at a friends home two years ago. I had blogged about it here. The fruit crumble is a dish of British origin where fruit either in the raw form or stewed is topped with a crumbly mixture of flour, butter and sugar and then baked in an oven till the topping is brown and crisp. Some of the fruits used in a crumble are apple, plum, peach and blackberry.  The crumble is then named after the fruit which is used in it, as mine would be an apple crumble.
This particular dessert is fast to prepare, can be had as it is or served along with custard, whipped cream or ice cream. It sure is a winner when served at a gathering.
A serving of golden brown apple crumble.
Pictured with a topping of vanilla ice cream.

Ingredients:

  • 750 gm or 5 apples
  • 50 gm brown sugar
  • 1/2 tsp cinnamon powder
For the crumble:
  • 300 gm plain flour
  • 175 gm brown sugar
  • 200 gm unsalted butter cubed at room temperature
  • knob of butter for greasing
Method:
  1. Wash, peel, core and chop the apples into small cubes.
  2. Mix the chopped apples with the sugar and cinnamon powder. 
  3. Sieve the flour. Place the flour and sugar in a large mixing bowl. Taking a few cubes of butter at a time rub into the flour sugar mix. Keep using all the butter and rubbing till the mixture resembles crumbs. 
  4. Preheat the oven to 180C.
  5. Grease a 26 inch ovenproof dish. Spoon the fruit mixture at the bottom of the dish, spreading it evenly. Sprinkle the crumble mixture on top.
  6. Bake in the oven for 45 minutes till the crumble is browned.
  7. Serve with custard or a scoop of vanilla ice cream.

Saturday, February 9, 2013

One pan Eggless Chocolate Cake.

I had made plans for this weekend. Since the kids were to have an entire week's holiday thanks to the German carnival, I wanted to make the best of it. Attend a carnival parade, a visit to a museum, maybe squeeze in a german town too. Our girl had different plans though. Wednesday she returned home from a two night choir trip from school. She looked happy and content with the good time she spent with her friends. Towards evening I recognised the nagging cough of hers and something told me that a fever was on its way. True to my thoughts, she woke up with a burning forehead and body too. Today is day 3 and we are nowhere close to respite. Since the doc has recognised it as a viral fever we are to expect it to last for a total of 5 days. 

Today being day 3 of playing nurse, I am close to wanting to run away somewhere. But that, I cannot do. In between preparing meals for the healthy us and sick man's food for her, I also desired to have a sweet treat. Only that I wasn't prepared to slog myself away in the kitchen for a few more hours. Call it good luck or what, I bumped into this recipe last night during my time spending next to her. It's a no fuss, no frill cake. The best part being that you dump all the ingredients in the pan you will be baking in, mix it all together with a spatula, bake and voila, you are done!!
The perfect recipe for today!! While I did have my doubts about the end result, it has turned out to be a super soft and moist cake. Also got the thumbs up from sonny boy.  So when you are tired and wanting a sweet treat with zero effort, I suggest you to bake this cake. You won't be disappointed.

Ingredients:
  • 2 cups all purpose flour
  • 1 and a quarter cup granulated sugar
  • 1/2 cup unsweetened cocoa powder
  • 1 teaspoon baking powder
  • 1 and a quarter cup cold water
  • 1/2 cup olive oil or vegetable oil
  • 1 teaspoon white vinegar
  • 1 teaspoon vanilla extract
  • 1/2 tsp salt
Method:
  1. Heat the oven to 180C.
  2. Take an un greased 12" round baking pan.
  3. Place flour, sugar, baking powder, cocoa powder and salt in the pan.(see above pic)
  4. Stir till the mixture is well combined.(see above pic)
  5. Pour water, oil, vinegar and vanilla to the above and stir well till you have a smooth batter.(see pic above)
  6. Place the pan in oven and bake for 30-40 minutes or until a skewer comes out clean.
  7. Enjoy the no frill, no fuss cake..:D

Notes:

  • The original recipe has measures for an eight inch square pan. I wanted a slightly larger cake, hence increased the proportions accordingly.
  • I sieved the flour and baking powder together though it was not mentioned in the original recipe.
  • I had a doubt whether the cake would be stuck to the pan as it was not greased. It comes out perfectly. 


Tuesday, February 5, 2013

Mirchi ka Salan

We have a Turkish shop in Lohr which I frequent as it's my main source of coriander leaves. While packed frail leaves are available at times in the local supermarkets, I am able to get the freshest bunch from this place. Yesterday, along with the leaves, I caught a glimpse of these fresh big green chilies calling out to me. With the weather being cold and the incessant rains providing misery, I imagined us relishing piping hot mirchi bajjis. 
Well, this morning turned out with a different plan. Breaking my head for a while about dinner, this particular dish popped to my mind. Since I already had the chillies along with the required ingredients, bajjis were soon replaced with Mirchi Ka Salan.
Mirchi ka Salan is a popular curry of Hyderabad. The chillies are deep fried briefly and then simmered gently in a paste made of spices and peanuts together. The nuts provide a nutty texture to the dish. While traditionally it is served along with Hyderabadi Biryani, it also makes for a great accompaniment with plain rice or rotis.

Source: www.sanjeevkappor.com(recipe adapted to suit our taste)

Ingredients:

  • 12 big green chillies
  • Oil to deep fry
  • 2 tbsp sesame seeds
  • 2 tbsp coriander seeds
  • 1 tsp cumin seeds
  • 1/2 cup roasted peanuts
  • 3 dry red chillies(long)
  • 1" ginger chopped
  • 8 cloves garlic
  • marble sized tamarind
  • 1 tsp turmeric powder
  • 1 tsp mustard seeds
  • 2 sprigs curry leaves
  • 1medium onion chopped very fine
  • salt to taste


Method:

  1. Wash and wipe the green chillies. Slit them lengthwise gently, taking care as to not break them into two. 
  2. Heat sufficient oil in a kadai, deep fry the chillies for a minute. Drain, place them on an absorbent paper and set aside.
  3. Dry roast sesame, coriander and cumin seeds.
  4. Grind them to a paste along with the roasted peanuts, ginger, garlic, dry red chillies, turmeric powder, tamarind and a little water.
  5. Heat two tablespoons oil in a vessel. When hot add the mustard seeds. When they splutter drop in the curry leaves. Saute for a few seconds. Add the chopped onion and fry till golden brown.
  6. Add the ground paste and fry for 3 minutes, stirring continuously. Take care to not burn.
  7. Rinse the mixer with a cup of water and add this to the fried paste. Mix well and bring it to a boil.
  8. Reduce the heat and cook it for 10 minutes.
  9. Add the fried green chillies and salt to taste. Cook on low heat for a further 10 minutes.
  10. Take off the heat and serve with hot rice or rotis.


Thursday, January 31, 2013

Vegetable Puffs

One of the reasons I do not see myself making Germany or any of its neighbouring countries as a place to settle down for good is the WINTER. Snow is fine, I can get along with it, the low temperatures, yeah, can live with that too. So what's it that gets me down...................................
it's the definite lack of colour.
And when you add never ending rain, grey skies and bare trees to the picture, it's a sure path to looking grumpy and feeling low. So rather than sit around and brood myself out, I have been spending time in the kitchen a wee bit more than intended. After the cooking, I must be also providing sheer entertainment to my german neighbours with my crazy antics during the photo shoot. Well, a girl's gotta keep herself busy even if it means looking crazy.

Coming back to these vegetable puffs, who would have ever thought that these could be made at home. My memories of the crispy crust with a soft filling of spiced onions, potatoes and peas goes back to the days when mum would thrust a few rupees in my hand and ask me to bring these home on our way back from school/college. On such days, we were a happy lot and couldn't wait to get back home and dig ourselves in. 

When a fellow expat and I were talking about the food we missed so badly, she surprised me by saying that there was puff pastry available and it was good too. The funny part about shopping in Germany is that you've got to know the german terms of your grocery list, else you can simply assume that ingredients are simply unavailable. Thanks to her, I've been preparing these vegetable puffs quite often, more so, whenever I am reminded of home.

Ingredients:
  • 2 sheets puff pastry(see notes)
For the filling( for 10-12 rectangular puffs):
  • 4 medium sized potatoes
  • a fistful of frozen or fresh peas
  • a medium sized onion sliced fine
  • 1/4 tsp mustard seeds
  • 1/2 tsp bafath powder or red chilli powder
  • 1/2 tsp turmeric powder
  • salt to taste
  • 3 tbsps oil

Method:
  1. Wash and boil potatoes with skin in sufficient water. Cool them, peel, mash well and keep aside.
  2. Slice the onion fine.
  3. In a handi/vessel heat the oil.
  4. When hot, add the mustard seeds.
  5. When they begin to splutter, add the onions and fry well.
  6. As the onions turn golden brown, add the chilli/bafath and turmeric powders.
  7. Mix well and continue to fry for a minute.
  8. Add the boiled and mashed potatoes along with the green peas.
  9. Mix well and continue to cook till the peas are cooked(5 to 7 minutes). Keep stirring and avoid the mixture from burning.
  10. Switch off and let the mix cool down.
  11. Preheat the oven to 220C.
  12. Line a baking try with parchment paper.
  13. Spread out the pastry sheet on a clean platform.
  14. Using a knife or pizza cutter, cut into equal shaped rectangles(see pic above).
  15. Place the potato filling in the centre of each rectangle. Do not overcrowd the base.
  16. Close or seal the potato filling with the folded flap and seal the edges well(See pic above).
  17. Place the puffs neatly in a line on the baking try. Do not keep too close to each other.
  18. Place the tray on the middle rack and bake for 10 minutes or till they are golden brown in colour.
  19. Remove from oven, let cool(Do not burn your mouth as I did) and have them with a hot cuppa tea.


Notes:
  1. Puff Pastry is called BLÄTTERTEIG, available in Edeka, Kupsch, Lidl and Tegut. There are two kinds available, one in the frozen section and the other in the coolers(along with the butter, curd etc). The frozen pastry can be kept upto many months, where as the one in the coolers need to be used within a short period of time. Personally, I prefer the latter.
  2. Puff pastry comes in sheets or in different shapes too. It is left to your personal choice as to what you would like to get and how you would like to shape it.
  3. You can experiment with the filling. This is a simple recipe which my family likes. You can add minced meat, eggs, vegetables, different kinds of herbs and spices too. Experimentation is the key.


Tuesday, January 29, 2013

Pork Vindaloo

Off lately, the family and I have been watching the BBC food series on our iPad. One of the presenters being Madhur Jaffrey, we love the way she weaves around different states of India, cooking up dishes relevant to the state in exotic locations. Like the Pork Vindaloo, a dish which the Goans prepare a lot. Influenced by the Portuguese settlements that arrived in the early 16th century in Goa, the name Vindaloo is derived from the Portuguese dish "Carne de Vinha d'Alhos", which means a dish of meat(pork) with wine(vin) and garlic(alho). It was fascinating to watch Madhur cook in the famous ruins of the St. Augustine's monastery in Old Goa. She sufficiently inspired me to try the same in my german kitchen and the result being, we have a new found love.

When you do intend to prepare this, I suggest you to plan in advance as this recipe requires overnight marination. 

Ingredients:

  • 1250 grams pork, cleaned, washed and cut into big cubes
  • 1 tsp salt
  • 5 tbsps brown/malt vinegar
  • 6 cloves crushed garlic
  • 3 large onions sliced
  • 2 medium chopped tomatoes
  • 3 slit green chillies
  • 3 tbsps oil
  • 1 tbsp sugar
  • 1 cup water
For the MARINADE:
TO POWDER:
  • 12 long dry red chillies
  • 1/2 tsp cumin seeds
  • 3" cinnamon stick
  • 12 cloves
  • 1/2 tsp pepper corns
  • 6 cardamoms
TO GRIND TO A PASTE:
  • 12 cloves garlic
  • 2" piece ginger
  • 1/2 tsp turmeric powder
  • 5 tbsps vinegar

Method:


  1. Apply salt and 5 tbsps brown vinegar to the meat and keep aside for 2 hours.
  2. Meanwhile grind the ingredients coarsely mentioned in TO POWDER.
  3. Grind the ingredients to a paste mentioned in TO GRIND TO A PASTE.
  4. Mix the powdered spices and the ground paste together to form a thick dry paste.
  5. Apply half of the above paste to the marinated meat and refrigerate it overnight. Refrigerate the remaining paste too (Pic 1 and 2 above).
  6. On the following day, slice the onions, crush the garlic, chop the tomatoes and slit the green chillies.
  7. In a deep bottomed vessel heat the oil.
  8. When hot, drop in the crushed garlic and fry for a few seconds till you get an aroma.
  9. Add the sliced onions and fry till golden brown (Pic 3 above).
  10. Drop in the slit green chillies, chopped tomatoes, the remaining paste and sugar. Fry well for about 5 to 8 minutes on high heat. 
  11. Add the marinated meat and continue frying for another 5 minutes.
  12. Add a cup of water *(see note), bring to simmer and cook for 45 minutes on medium heat.
  13. Adjust salt to taste, remove from heat and garnish with slit green chillies.
  14. Pork Vindaloo can be had with rice or bread of your choice.

Notes:

  1. You can substitute brown with white vinegar.
  2. The water that has been used to clean the mixer of the ground paste can be kept aside and used in the preparation.
  3. Pork Vindaloo can be kept for up to a week in the refrigerator. The longer you keep it, the better it tastes with each passing day. 

Friday, January 11, 2013

Mangalorean Cashew Macaroons

If you were to ask any Mangalorean to name one of their favourite childhood sweets, I am sure the majority of them would reply "Macaroon" pronounced more as "Mukroons"...:D
The sugary goodness coupled with the crunchy cashew nuts would simply melt in ones mouth. From what I recall, we always got these macaroons from a sweet meat shop called Taj Mahal which was located right at the city centre. So a trip to the city meant a definite pack of goodies. 
I remember them being quite expensive by the kilo and had simply assumed that they must have been laborious to prepare. Not to forget also the price of cashew nuts.

Moving to Germany saw me being introduced to the coconut macaroons. A christmas preparation in many households. Sadly, I never developed a liking to it.  While the germans like their macaroons to be golden brown and heavy with coconut, I wanted to retain the colour, look and texture of the original ones I remember eating from childhood. Today, I was inspired to experiment on making a small batch of them. So, here goes....

Ingredients:
  • 1 egg white at room temperature
  • 175 gm finely powdered sugar
  • 1/4 tsp cardamom powder
  • 75 gm unsalted cashew nuts
Method:
  1. Chop the cashew nuts coarsely.
  2. Preheat oven to 90C.
  3. Separate the egg white from the yellow. There should be no traces of any yolk at all.
  4. In a mixing bowl, beat the egg white till stiff. When you lift the whisk, the peaks should not drop or fall down.
  5. Add the powdered sugar a little at a time to the egg white and keep beating. Continue till all the sugar has been used.
  6. Beat in the cardamom powder.
  7. Gently fold in the chopped cashew nuts into the sugar egg mix.
  8. Line a baking tray with parchment paper. Drop in spoonfuls( I used a tablespoon) of the macaroon mix. Use the same level of mix for each macaroon. I din't bother about the shape. I let them be irregular as it is. Use up all the mix(makes 12).
  9. Place the tray on the lower rack and bake them for 40 to 50 minutes until crisp *See note
  10. Remove the macaroons from the tray and let them cool.
  11. Store in air tight container.


Note:

  • When trying out a new recipe in your oven, I suggest you to know your oven well. Baking procedures and temperatures differ from oven to oven. I have a manual for mine which clearly states what rack should I place my tray in(lower, middle or higher), what temperatures should I use and how long should the baking process be for different recipes(cookies, cakes, pizzas, meringues). Based on this information and using my judgement, I proceed with the recipe.
  • If you like your macaroons to be slightly/golden brown you can raise the temp up a bit to 120C.


Monday, December 17, 2012

Chocolate Truffles

Want to gift something home made that looks pretty and tastes equally good too? How about some truffles? Last year I baked the rich Indian plum cake and gifted them to all the german friends we had made over time. Not only were they stunned with the gesture, they were equally appreciative of our christmas tradition and relished the same. In return, one of the families gifted us with home made truffles. While we live in the land of Lindt and Nestle, the world famous European chocolates, I was taken aback by how delicious home made truffles tasted. Honestly, as I mentioned, we need no reason to make them at home cause when it comes to chocolate, we do get the best. But curiosity got hold of me and I was more than tempted to give a shot to making them myself. 

This is a german recipe which I have tried from one of the many german magazines that I have begun to buy. What surprises me is the use of our spices in so many german christmas preparations. While cinnamon and cardamom are used on a regular basis in our Indian cooking, germans tend to use them more in their christmas baking. 
These truffles are easy to make, taste real good and when wrapped in delicate film with a catching ribbon to go, it does make for a great christmas gift. While the original recipe called for the truffles to be dusted with cocoa powder, we found it to be bitter, hence I used dessicated coconut to roll them in. 

Ingredients:
  • 1 vanilla bean
  • 175 ml whipped cream
  • 2" cinnamon sticks
  • 2 cardamoms
  • 1 star anise
  • 150gm white couverture chocolate
  • 250 gm milk couverture chocolate
  • 80 gm soft butter
  • a bowl of desiccated coconut


Method:

  1. Slit the vanilla bean and scrape the seeds carefully. In a thick bottomed vessel, mix the cream along with the vanilla seeds and bean too(after you have scraped the bean do not discard it). Add the cinnamon sticks, cardamoms and star anise. Bring the mixture to a boil.
  2. Remove from heat and keep it aside so that the spices are infused into the cream well.
  3. Meanwhile chop the white and milk chocolate into smaller pieces with a sharp knife. Place them in a deep bowl(preferably glass)
  4. Strain the infused cream. Discard the spices, and bring the cream once again to a boil.
  5. Pour the hot cream into the chopped chocolate. Keep stirring till the cream and chocolate are melted and mixed together well.
  6. Wrap the bowl in a cling film and refrigerate it for 5 hours.
  7. After 5 hours, add the melted butter to the chocolate mixture and stir well. If the mix is too hard, use your hands. Refrigerate it for another hour.
  8. Line a flat tray with butter paper. Remove the chocolate mix. Scoop out small mounds of the mass and roll it against your palms to form small sized truffles. Roll the truffles in the dessicated coconut and arrange them on the tray. Use up all the chocolate mix. You should be able to make around 60 truffles.
  9. They keep well for up to a week in the refrigerator. Before serving, bring them to room temperature.
Note: If you are unable to find couverture chocolate you can replace it with ordinary chocolate.

Sunday, December 9, 2012

Choco Almond cookies

So the big fluffy flakes finally fell upon us or rather whole of Germany. Too bad for the kids who were eagerly waiting to go sleighing. The hubby and I have been taking turns falling ill with the normal fever and cold. I guess we are growing old hence our bodies are taking time to adjust to the onset of winter. For me this is just the wrong month to be even lying in bed. With the umpteen jobs to be done, I really had to get better soon. It was hard convincing the kids though that we needed to stay indoors. We had to be content watching the snow flakes fall gently. 

Today's batch of cookies is the one I first began my advent baking experiment with. According to the kids, they rate number one in the entire batch of baking I have done so far. The reason being the secret ingredient - CHOCOLATE. You really can't separate the two, Kids and chocolate, can you? Not only did the experimental batch get over soon, over the next few days, as they munched on the different varieties, a small question would be heard every now and then "When are you going to bake the chocolate ones again?". Bake I did, only to promptly store them all in my new christmas tins and hide them from the hungry mouths. This mommy needs a break, truly!! and the cookies will come out of hiding just in time for Christmas!! :D


Ingredients:

  • 100 g dark chocolate
  • 30 g cocoa powder
  • 100 g hazelnuts with skin, powdered
  • 100 g almonds with skin, powdered
  • 50 g almonds peeled and chopped into fine bits
  • 200 g powdered sugar + for rolling the dough(optional)
  • 1/2 tsp cinnamon powder
  • 1/2 tsp clove powder
  • 2 egg whites
  • 1 tsp almond essence
  • Halved almonds to garnish

Method:
  1. Grate the chocolate fine.
  2. Beat the egg whites till creamy(not until they are stiff peaks).
  3. In a bowl mix the cocoa powder, powdered hazelnut and almond, chopped almonds, powdered sugar, cinnamon and clove powders. Add the grated chocolate and mix very well.
  4. Add the beaten egg whites and almond essence. Knead well to form a tight dough. If the dough is not tight enough add more almond powder ( I didn't need any).
  5. Wrap the dough in cling film and refrigerate for 2 hours.
  6. Line a baking tray with baking paper. 
  7. On a clean surface, sprinkle some sugar and roll out the dough. With the help of a knife cut into small squares( 1" x 1"). Place halved almonds on each square and line them neatly on the baking tray.
  8. Preheat the oven to 200 C.
  9. Bake the cookies on the middle rack for 8 to 10 minutes(At 8 minutes they are chewy which Ms A loves and a little more time makes them crisp and nutty which the remainder of us like).
  10. Remove, let cool. Once completely cool, store them in an air tight tin.


With this, I am done with the german cookie recipes. Next on my to bake list is the rich plum cake and my heart desires to make the mangy kidiyos and neuris. Keeping my fingers crossed to achieve all of the above.

Thursday, December 6, 2012

Ginger cashew cookies

I do not know if the season of advent stresses you out, but it does to me. So much to do, so little time. I am kind of waiting to tick of all the jobs on my to do list. These were the next batch of cookies I made last week. Husband loved them, the kids were kind of neutral, maybe because they preferred the Zimtsterne and butter cookies to these. I will be baking more of them the following week.

Ingredients:

  • 100 g brown sugar
  • 70 g butter
  • 2 egg yolks
  • 150 gm finely chopped cashew nuts
  • 70 g all purpose flour sieved
  • 100 g finely chopped candied ginger
  • 1/2 tsp dry ginger powder

Method:

  1. Beat well the sugar and butter together.
  2. Add the yolks of the egg one at a time and continue beating.
  3. Add the finely chopped cashew nuts, candied ginger, flour, and ginger powder.
  4. Knead together to form a smooth dough.
  5. Wrap in a cling foil film and refrigerate for half an hour.
  6. Line a baking tray with baking paper. Preheat the oven to 170 C
  7. Form small sized balls(roughly a medium sized marble), flatten them slightly to look like above and place them in neat rows on the tray.
  8. Place a cashew nut on each of the cookie.
  9. Bake the cookies for around 10 to 12 minutes till they are golden brown. Be careful not to burn.
  10. Remove them and let them cool well. Store in an air tight jar. 

Notes:

  • When you remove the cookies out, they will feel soft. They are supposed to be that way. As they cool, they get hard.
  • The above batch makes about 50 cookies.

Monday, December 3, 2012

Pepper Chicken


We had our first snowfall yesterday. In fact we woke up to this scene outside our windows. First snow fall of the year is always special, especially for the kids. They eagerly look forward to making snowballs and snowmen coupled with sleighing downhill. Last year we barely had any, so they missed out on all of the above. Since this is our last European winter, I too have been kind of silently wishing that they are not disappointed and that the snow gods will send us some big white fluffy flakes soon.
With the snow, it also means that the temperatures keeps plunging low into the negative. What better way than to keep ourself warm with a hot spicy gravy for lunch. This was where the pepper chicken came to our rescue. Soft tender pieces of chicken gently stewed with spices and relished with whole wheat bread. Yum, yum, yum!!!

Ingredients:
  • 1 kilo chicken, cleaned and cut into small pieces
  • 4 large onions chopped
  • 4 medium tomatoes chopped
  • 2 tsp ginger garlic paste
  • 1 large green chilli finely chopped
  • 4 cardamoms
  • 6 cloves
  • 4 " cinnamon stick
  • 3 tbsp coriander powder
  • 2 tbsp cumin powder
  • 2 tbsp pepper powder
  • 1/2 tsp turmeric powder
  • 1 tsp mustard seeds
  • 2 sprigs curry leaves
  • 2 tbsp ghee
  • salt to taste
(not the best pic, thanks to the snowfall and hardly any light)

Method:
  1. In a thick bottomed vessel, heat the ghee. When hot add the mustard seeds. When they begin to splutter, drop in the whole spices and curry leaves. Stir for 10 seconds.
  2. Add the chopped onions, green chilli, ginger garlic paste and fry well till the onions are slightly brown.
  3. Add the tomatoes and fry well till the onion and tomatoes are all mushy and formed into a rough paste(10 to 15 minutes).
  4. Add the powders : coriander, cumin, pepper and turmeric and fry well for another 5 minutes.
  5. Drop in the chicken pieces, stir carefully to coat all of them with the onion tomato masala. Fry it on high heat for 5 minutes. Take care not to burn.
  6. Lower the heat and cook covered for 15 minutes or till chicken is tender. Do not add any water as the juices from the chicken will be released. If you feel the gravy is dry and burning then add a quarter cup of water. If you would like it dry, then skip the water but take care to see that the dish does not burn.
  7. Serve hot with whole wheat bread and a side serving of salad of your choice.
Note: 
  • I didn't add any water at all. The gravy is the chicken broth on its own.
  • This preparation is on the spicier side. 

Wednesday, November 28, 2012

Zimtsterne - German cookies

I am doing a happy jingle today. Cause I got these cinnamon stars just right!! Or rather the icing, PERFEKT!! The last time I made them was over 2 years ago. Then, I referred to an english version of the cookies. Since then, I have come a long away. It shows in the cookies themselves. Being able to read and also understand the german language(especially recipes) has helped me tremendously!! 
While I thought there was only one recipe with almonds for the Zimtsterne, the Advent baking book of mine told me something else. There were different kinds of recipes for the same star, some with different spices, some with a different kind of icing, and others with a mix of nuts(which today's recipe is). 

To tell you the truth, I do not know why these cookies are called Zimtsterne. Zimt means cinammon and sterne means stars. The sterne part is explainable, but zimt ?? As you dig into these cookies, you get the slightest hint of spice, what is dominant though is the nutty, chewy texture of almonds.I guess some things just remain at that with no explanation..:-)
Coming back to the recipe, I followed the ingredients mentioned in my book, a mix of hazelnut and almond powders. For the method, I went against what I read in both the book and the internet. As we go along, will tell you why I decided to do it differently.


Ingredients:

For the cookie dough:
  • 2 egg whites
  • 150 gm powdered sugar.
  • 150 gm almonds with skin, powdered 
  • 150 gm hazelnuts with skin, powdered 
  • 1/2 tbsp cinnamon powder
  • 1/2 tbsp orange peel
  • salt to taste

For the icing:

  • 1 egg white
  • 100 gm powdered sugar.
Method:
For the cookies:

  1. Beat the egg whites and powdered sugar together till you get soft snowy peaks.
  2. In a bowl, mix the hazelnut and almond powders along with the salt, cinnamon and orange peel.
  3. Add the beaten egg mixture slowly to the above and knead together to form a dough(pictured above).
  4. Wrap the dough in cling film and refrigerate it for an hour.
  5. Line a baking tray with parchment paper.
  6. Sprinkle powdered sugar on a clean surface and flatten the dough to 1/4" thickness(or less). 
  7. Cut out stars and neatly arrange them on the tray(pictured above).
  8. Bake for 20 minutes at 150 C. 
  9. Take them out and let them cool. 
  10. Prepare the icing by beating together the egg white and the powdered sugar. The mixture should be thick.
  11. Apply the icing on the cookies with the help of a spoon(I used the back of a small baby spoon to spread out the icing on each star pictured above).
  12. The icing should set in about 20 to 30 minutes.
  13. Store the cookies in an air tight jar. Can be kept for upto 2 weeks.

Notes:
  1. 99% of the recipes apply the icing before baking the cookies. Why I decided to try this method was with the past experience of having done the same and not resulting in pretty cookies. A comment from fellow blogger Shireen as to how she did it and stumbling upon a video which supported her theory I decided to give this method a try. Since the above icing is nothing but royal icing, the cookies taste equally good and you can keep them for upto 2 weeks.
  2. If you would like to bake the cookies along with the icing,  after step 7, apply the icing on the stars and bake them at 150 C for 20 minutes. Take care that the icing does not get brown. 
  3. If you would like to prepare zimtsterne with almonds, then simply skip the hazelnut powder and use 300 gm of almond powder instead.


Monday, November 26, 2012

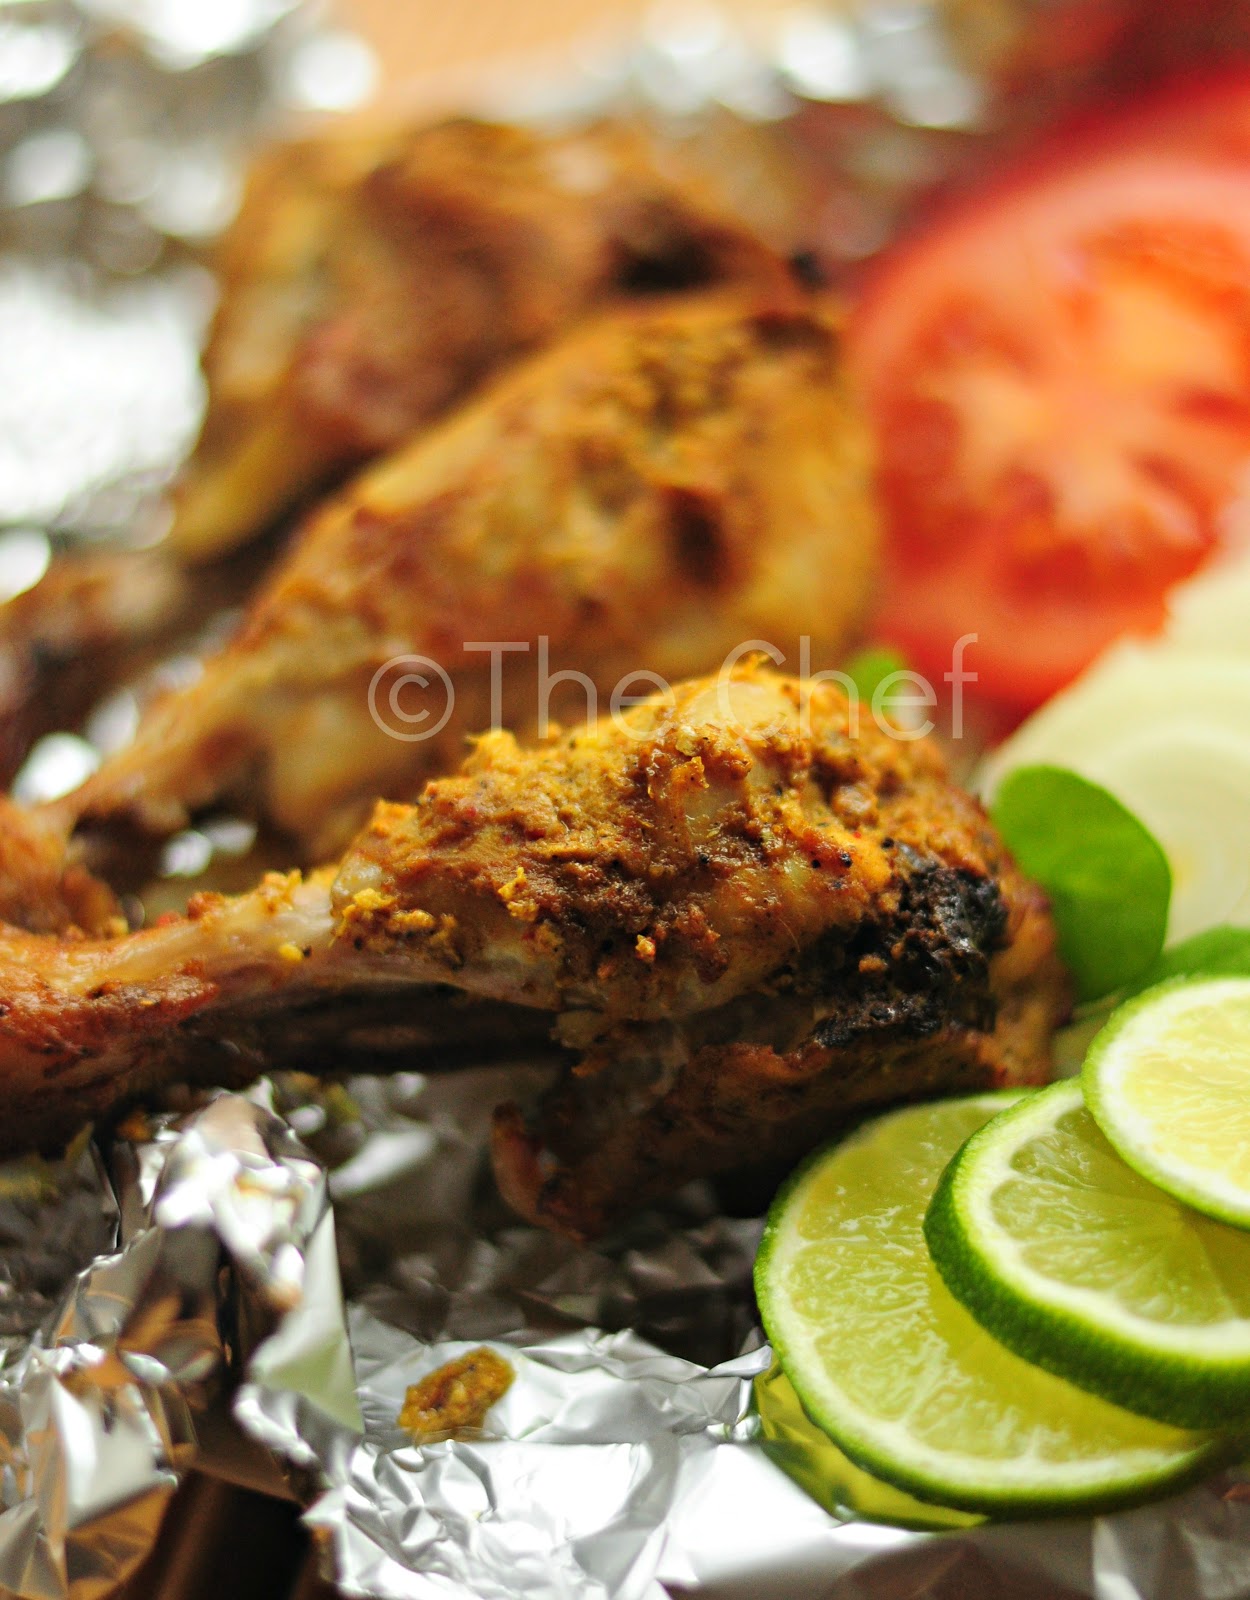
Tandoori Chicken

I am in a mood to lament about a lot of things. Foremost being the weather. But then, I choose to do that on my other blog and shall concentrate here only on the food.
Not a day goes by where I remember all the people who provided me back home with fresh veggies, fruits, groceries and at times, our emergency meals. One of them was kabab wala on Sarjapur road. The tandoori chicken and kababs this joint made were so deliciously succulent that we needed no excuse to bring them home every other day or two.
Once we moved here, I so missed this place a lot especially on the days when my body was sore with all the german cleaning I had done!!! Since Lohr has no authentic Indian restaurant at all, most of the time, for our emergency meals we have to make do with a pizza or just german bread with the cold meat.

But then, how long can we just sit and remember the food we loved so much? Not very long. Thanks to a fellow expat who told me how to go about with this recipe in the oven. It turned out perfect. In a week's time I prepared it twice just cause the kids wanted more. I skipped the red colour cause it wasn't available and I felt that the colour was the least important ingredient.

Source: vahrehvah.com (spice levels altered to suit our taste)

Ingredients:
  • Chicken legs: 6 or a kilo
  • Coriander powder  1 tsp
  • Cumin powder 1 tsp
  • Garam masala powder: 1 tsp
  • Ginger garlic paste 1 tbsp
  • Pepper powder 1 tsp
  • Red chilli powder 3 tsp
  • Turmeric powder 1 tsp
  • salt to taste
  • Lemon juice of half a lemon
  • Yoghurt 6 tbsp
Method:
  1. Clean the chicken legs, pat them dry and make 2 to 3 slits across them.
  2. Apply the salt, 1 tsp of red chilli powder and lemon juice to the legs and keep aside for 15 mins.
  3. Make the marinade paste by mixing all the powders including the remaining teaspoons of chilli powder and ginger garlic paste along with the yoghurt. Mix well. Add more salt if required.
  4. Apply this paste to the chicken legs taking care to see that they are well coated especially in the areas where there are slits.
  5. Refrigerate the marinated chicken for 4 hours. The longer it is kept the better. 
  6. Line an oven tray(I use the tray provided with the oven) with aluminium foil. Preheat the oven to 220 C.
  7. Place the chicken legs neatly on the aluminium foil in the tray(This helps the chicken to cook in its own juices and at the same time gets the well grilled look)
  8. Place the tray in the centre of the oven. Using the fan grill function cook the chicken pieces for 35 to 40 minutes(turning halfway between).
  9. Serve with sliced rings of onion, lemon wedges and tomatoes.
Note:
I did not use any oil as the chicken we get here has its own fat content which is released during the cooking process.


Saturday, November 24, 2012

Delicate butter cookies


I have begun experimenting with german goodies on a small scale. Last year as I was attending a german course, to help myself get acquainted with the language I decided to read and understand recipes. Call it strange, but I love reading cookbooks and I thought what better way to try understanding a new language. Over time the first cook book I purchased was Backin im Advent(Baking in Adevnt). As the need for the google translator decreased I found myself getting excited at the prospect of just being able to understand simple recipes. 
The germans use their ovens a lot and I do mean A LOT!!! If I am right, the use of their cooktop(our cooking range) is minimal. Most of my local friends are surprised that most of us Indians may or may not have an oven in our homes. If they were to see the teeny tiny one I have in India, it surely would give their hearts quite a flutter..:D 
The first year we celebrated the season of advent in Germany I was amazed at the variety of christmas goodies. Cookies of different sizes, shapes and colour, truffles, pralines, gingerbread men and to go along with it the warm spiced glühwein. Even more surprising was that almost all the households baked their own treats. I found that very hard to believe cause that meant the germans baked REAL GOOD.

(For the commotion from the trio behind me, I did a pretty good job with the pictures!! Note to self: No more food photography when the family is home)

This year I have decided to along with the german trend of baking my christmas sweets. It's healthier and much easier. I will be baking the traditional Indian plumcake and if time permits the much loved kidiyo..:-) 
Coming back to my experiments, this particular book has more than 100 recipes. Surely I am not going to bake them all. I shortlisted around 10 of them and decided to try them when and as time was available. Depending on how good they went with the family, I would then prepare them on a larger scale. Last week I tried the first recipe, Almond Choco cookies, about 50 of them. In less than 24 hours they were over. I vowed that I would be baking them next only a few days before Christmas cause at the rate the family went I think I should camp next to the oven!!!
The next in line were these butter cookies. If not for repeated pleas to slow down you wouldn't be seeing this recipe too..:D Trust me, they are so good, you won't regret baking them.

(The autumn sun which shows itself rarely rending its glow on the buttery cookies)

Ingredients:
  • 250 gm white flour/maida
  • 100 gm sugar
  • 1 tsp candied orange peel
  • 125 gm cold butter(it shouldn't have melted)
  • 2 egg yolks
  • cookie cutters
Method:
  1. Sieve the flour. Cut the butter into small sized cubes.
  2. In a bowl mix together the flour, sugar, orange peel and cubed butter. Add the egg yolks, mix and knead well to form a soft dough*. 
  3. Wrap the dough in cling film and refrigerate it for 2 hours.
  4. Line a flat baking tray with baking paper. Heat the oven to 170 C.
  5. On a clean platform, sprinkle a little bit of flour. Roll out the dough(roughly 3 to 4mm thick). With your cookie cutters cut the shapes and place them on the baking tray. Do not crowd the tray.
  6. Keep shaping the cookies till you finish the dough.
  7. Bake them for 15 to 20* minutes till golden yellow.
  8. Remove them and let them cool.
  9. ENJOY.
Note:
  1. When you begin kneading it kind of resembles bread crumbs. Keep going with your fingers and the dough comes along beautifully.
  2. The baking time is dependant on your oven. The original recipe called for 10 minutes baking time. In that time my cookies were looking exactly the same as when I had placed them in. The perfect timing for my batch was 18 minutes. What I would suggest is for you to keep watch as they are baking and use your judgement to remove them out.
  3. The above recipe makes 45 to 50 cookies.


Monday, November 5, 2012

Prawn Pulao

Who doesn't love a recipe that is fast to prepare, but tastes as though you have put in a whole lot of effort to it. Well, I do. I prepared this simple prawn pulao for our Sunday meal and the entire process took me only 40 minutes. No kidding!! So here we go.


Ingredients:

  • Prawns 500gms
  •  2 medium sized onions
  • 2 large tomatoes
  • 2 tsp coriander powder
  • 2 tsp chilli powder
  • 1/2 tsp turmeric powder
  • 1 tsp cumin/jeera seeds
  • 1/2 tsp garam masala powder
  • 100 gm curds
  • salt to taste
  • 4-5 tbsp oil
  • coriander leaves to garnish
For the rice:
  • 500 gms Basmati rice 
  • 1 litre boiling hot water
  • 5 tbsp oil
  • 5 cloves
  • 2 sticks cinnamon
  • 3 green cardamom, 2 black cardamom

Source: Thangam Philip's book of Modern cookery

Method:

For the prawns:
  1. Shell, devein and wash the prawns well. Keep aside.
  2. Slice the onions and chop the tomatoes fine.
  3. Heat oil in a shallow pan. When hot add the sliced onions and fry till golden brown(quite brown).
  4. When done, add the cumin seeds and chopped tomatoes. Fry well till the whole mixture is mushy together(6 to 8 minutes).
  5. Add the prawns, coriander, turmeric and chilli powders. Add salt too. Fry the prawns well for 10 to 12 minutes adding the curds slowly at a time.
  6. If you wish you can add very little water(I didn't) and simmer till prawns are tender. The gravy should be thick.
  7. When done sprinkle with garam masala powder.
For the rice:
  1. Wash the rice, strain and keep.
  2. In a deep bottomed vessel heat oil. When hot add the cinnamon, cloves and cardamom. Fry for a minute.
  3. Add the rice and fry well for 5 to 8 minutes till you have a nice aroma. Take care as to not to burn the rice.
  4. When done add 3/4th litre of the piping hot water. Cover and cook. 
  5. If the water has evaporated add the remaining hot water and cook till done.
Assembling:
Once the rice is ready, arrange the rice and prawn with the gravy in layers. Garnish with coriander leaves. Serve with a cold raitha of your choice.

Notes:
  1. The above is my method of preparing the rice. I generally add a little less of the required quantity of water so that the rice doesn't get too mushy. If required I then keep adding little amounts of water till the rice is perfectly cooked.
  2. If you have any other method of preparing the pulao rice then by all means go ahead. 
  3. While the recipe called for layering the prawn with gravy and rice, I mixed it all well cause that is how we like it.
  4. While the rice was cooking I simultaneously prepared the prawns. The process from start to finish took me 35 to 40 minutes.

Wednesday, October 24, 2012

Chickpea/Kabuli Chana Fugad

We Mangaloreans are good at making fugad of every available legume or vegetable...:D That is one of the reasons why I feel I am unable to prepare any other vegetable curry..lol!! Ask my husband as to how I break into a sweat when we have shudh vegetarians over for lunch. Cause my basic knowledge of preparing veggies is reduced to fugad!!
Since our arrival to Germany and having gotten ourselves acquainted with Indian families who are vegetarians has encouraged me to take a bold step and whip up some veggie delights. I will definitely post some of the delicious vegetable gravies I have prepared, but for now, back to this dear chickpea fugad of mine.

Every family will have it's own unique way of preparing it. Here is mine.

Ingredients:

  • A cup of chickpeas soaked overnight.
  • 1 medium onion
  • 1 large tomato
  • 3 to 4 cloves garlic
  • 1/2 tsp mustard seeds
  • a sprig curry leaves
  • 1 tsp bafath powder
  • a handful of freshly grated coconut.
  • 4 tbsp oil
  • salt to taste
Method:
  1. Soak the chickpeas overnight for 12 hours.
  2. Drain them. Place them in a pressure cooker with enough water so that they are soaked well(roughly an inch above the peas). Add salt to taste and pressure cook till just about tender(They shouldn't be too soft). Since I use a german pressure cooker with no whistle, it takes me about roughly 15 to 20 minutes to cook.
  3. Meanwhile, slice the onion fine. Chop the tomato. Crush the garlic with skin.
  4. In a deep bottomed vessel or kadhai, heat the oil. When sufficiently hot add the mustard seeds. As they splutter drop in the curry leaves and crushed garlic. Fry for a few seconds.
  5. Add the sliced onion, fry for 2 minutes. Drop in the chopped tomato and fry well till both onion and tomato blend together. 
  6. Toss in the grated coconut and bafath powder. Mix well.
  7. Now add the cooked channa, a little of the stock(depends on how dry you want it). Mix well so that the coconut and masala is coated well around the peas. Adjust salt.
  8. Cook on a slow flame till peas are well cooked and water is absorbed. Do not allow it to burn.
  9. Have it with hot rotis or rice and sambhar.

Note: Since I had very few strips of fresh coconut, I added a fistful of dessicated coconut.

Monday, October 22, 2012

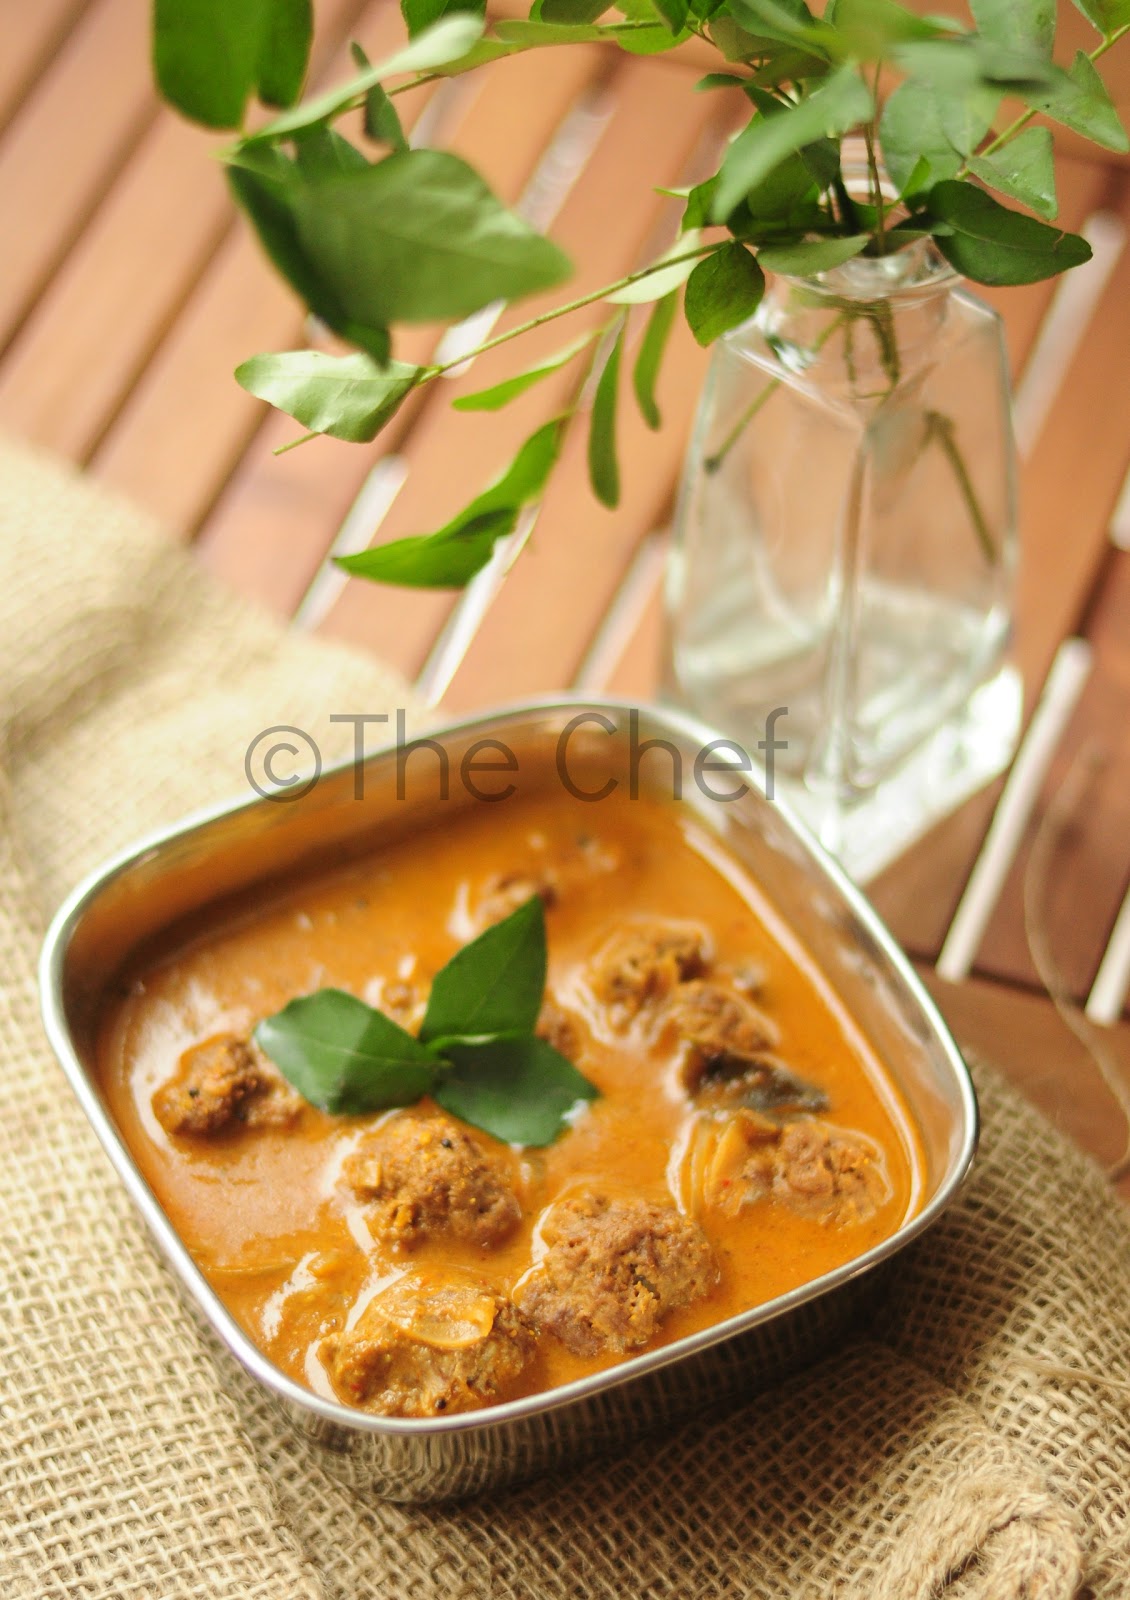
Malabar meatball curry

One of the things hubby loved to come home with is fresh flowers(smiles) and at times a newly purchased cookery book. While I used to love the flowers, the sight of the book used to literally amuse me. I would have have barely prepared a few recipes from the last purchased book and bang, a new one would have arrived. 
One such book was Modern Cookery by Thangam Philip. A no frills, no fancy kind of book with just recipes jotted down along with a few chapters dedicated to how to go about in the kitchen with your ingredients and food. This particular book also didn''t restrict itself to a particular region or cuisine of India. Thangam Philip had it all. Pretty soon, it turned out to be the most loved and used book of mine. I thought it fitting to note down the most loved recipes of her's in this blog. 


Source: Modern Cookery for teaching and the trade by Thangam Philip
Ingredients:

For the meat balls:

  • Minced meat 500 gms(beef)
  • Green chillies 4
  • 1 large onion
  • 1" piece ginger
  • salt to taste
For the curry:
  • 7 Red Kashmiri chillies
  • 2 short red chillies
  • 2 tablespoons coriander seeds
  • 1" piece ginger
  • 8 flakes garlic cloves
  • 1/2 tsp turmeric powder
  • 6 cloves
  • 1/2 " cinnamon
  • 4 cardamoms
  • 12 peppercorns
  • 1 tsp fennel seeds(saunf)
  • 2 tomatoes
  • 400 ml coconut milk
  • 5 tbsp water for grinding spices 
For tempering:
  • 1 tbsp each oil and ghee 
  • 2 sprigs curry leaves
  • a pinch of mustard seeds
  • 2 pods red onions or 1 small onion sliced

Method:
  1. Grind the minced meat in a mixer with the ingredients mentioned in for the meat balls.
  2. Add salt and form into 25 balls.
  3. Dry roast the red chillies and coriander seeds.
  4. Grind together along with the ginger, garlic, cloves, cinnamon, cardamom, peppercorns, fennel seeds, turmeric powder, tomatoes and water(The paste should be thick).
  5. In a vessel, heat oil and ghee together.
  6. When hot, add mustard seeds.
  7. As the seeds crackle, add the curry leaves and sliced onions. Fry them well till brown.
  8. Add the ground curry paste and fry for 10 minutes till you get a nice aroma.
  9. Rinse the mixer of the ground paste with a cup of water. Add this water to the fried paste and bring it to a boil.
  10. Add the meat balls one by one to the simmering liquid. Cook over a slow fire for 20 to 30 minutes.
  11. Add the coconut milk and simmer for another 5 to 10 minutes. Adjust salt and serve with hot rice or bread of choice.